Setting Up Facebook Pixel
What is Facebook Pixel?
Facebook Pixel allows you to create and track targeted ads on Facebook and Instagram. It lets you engage with people who have visited your website and create audiences and campaigns based on the pages they visit or actions they take to help make smarter sales.
You can use your Facebook Pixel for 3 different things:
- Building custom audiences
- Optimizing ads for conversions.
- Tracking conversions for your ads
This can help drive sales by putting your Shop ads in front of the right eyes and then track how effective those ads are working!
How to create or find your Pixel
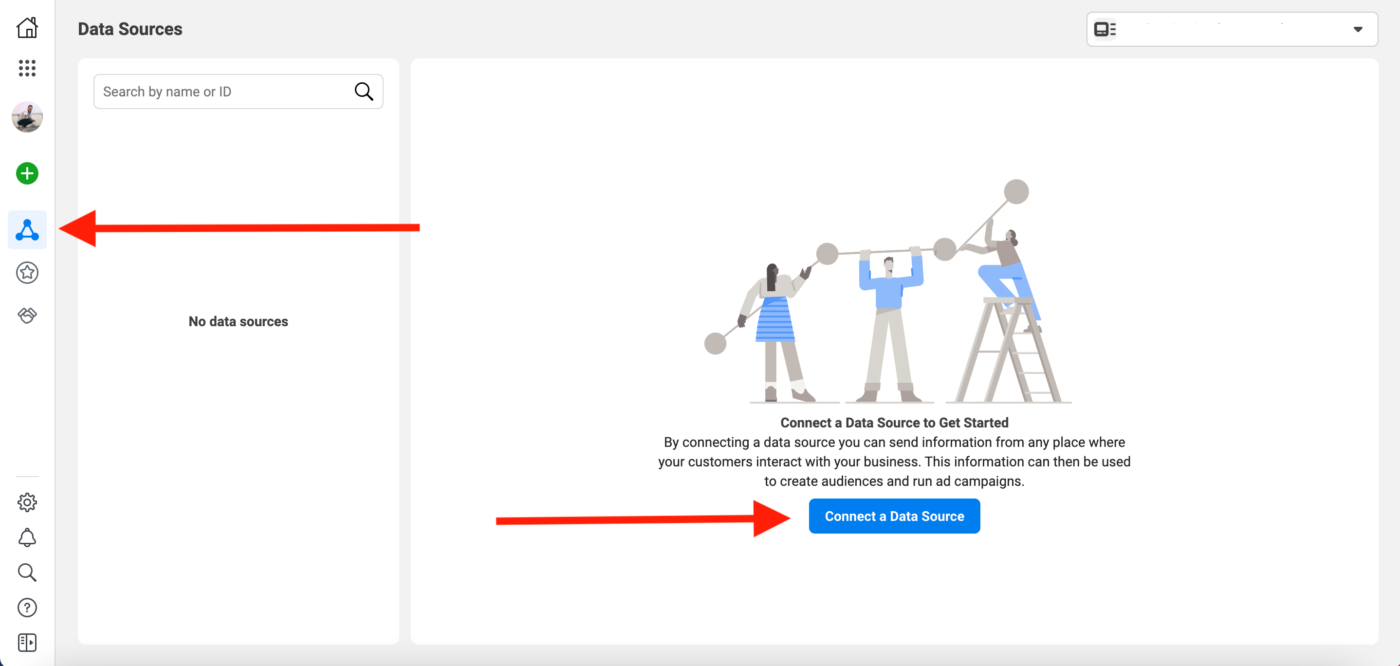
1. Click on the Data Sources icon in the Ads Manager, then click “Connect a Data Source.”
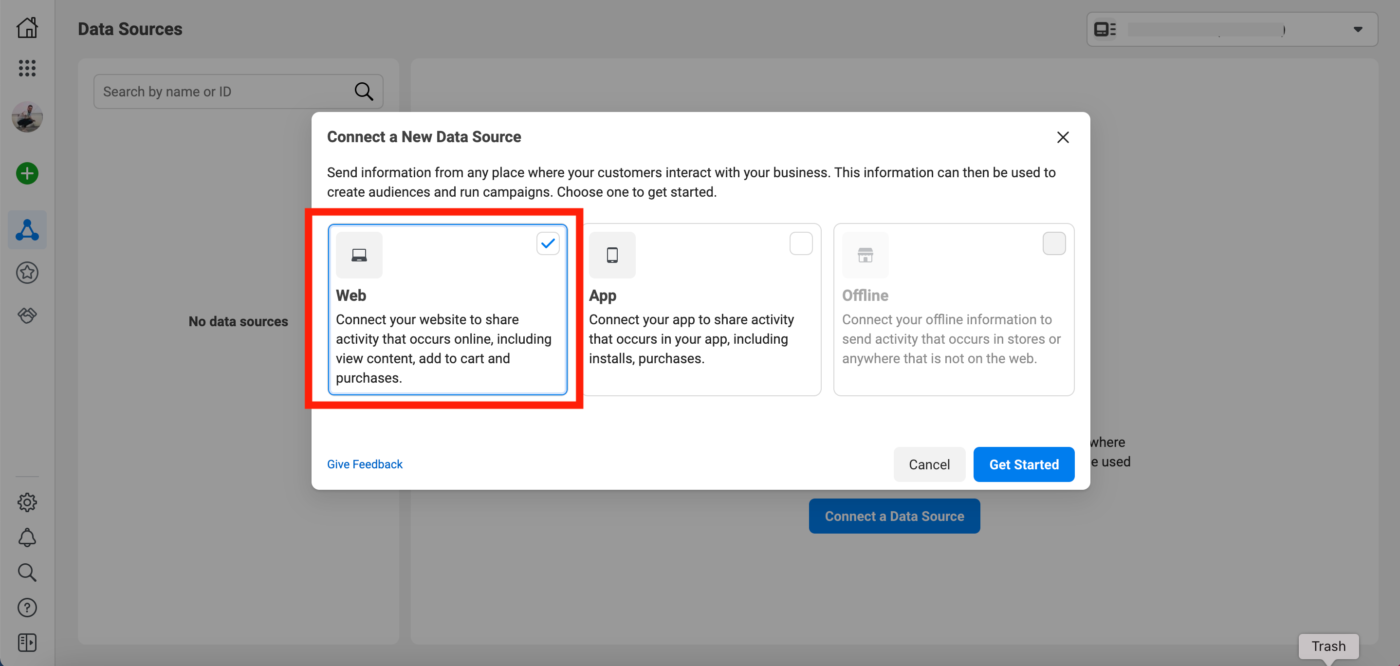
2. In the next prompt, select “Web.”
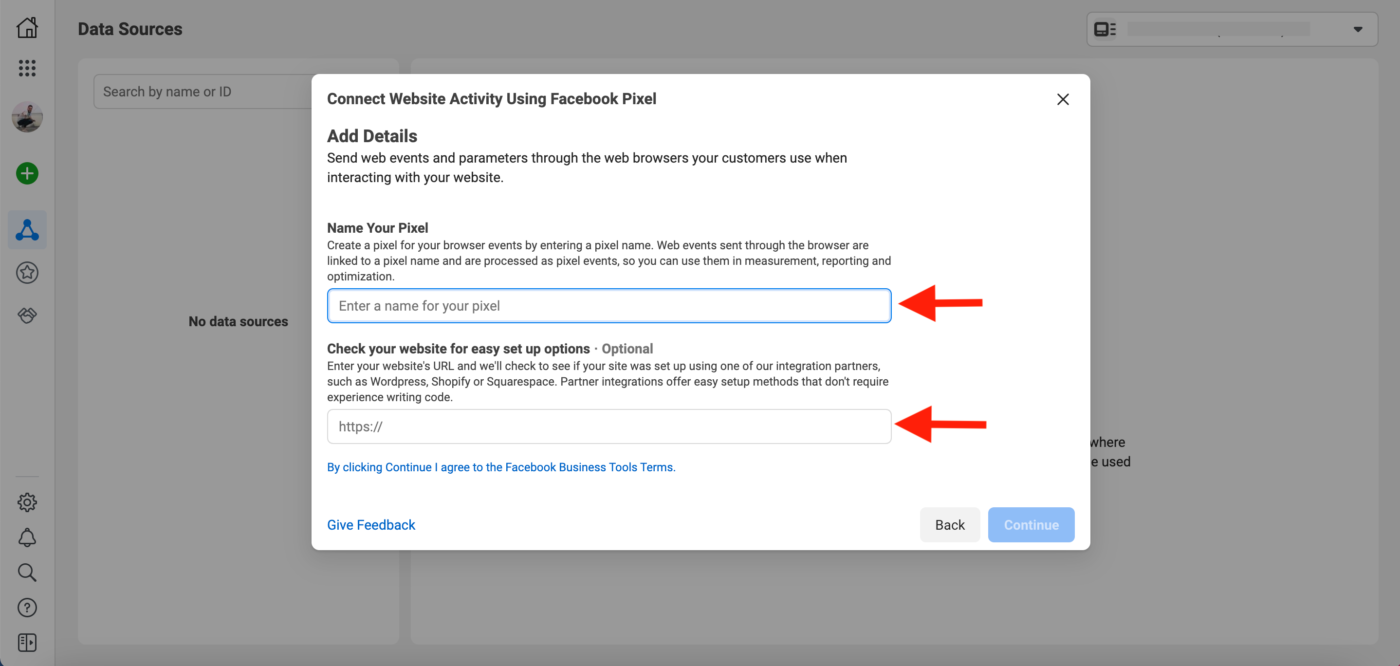
3. Enter a name for your Pixel and your Artist Shop’s URL. Then, click “Continue.”
There’s only one Pixel per ad account, so choose a name that represents your Artist Shop. Keep in mind, you can only create one Facebook pixel per account, so if you already have one, you won't see the Create Pixel button.
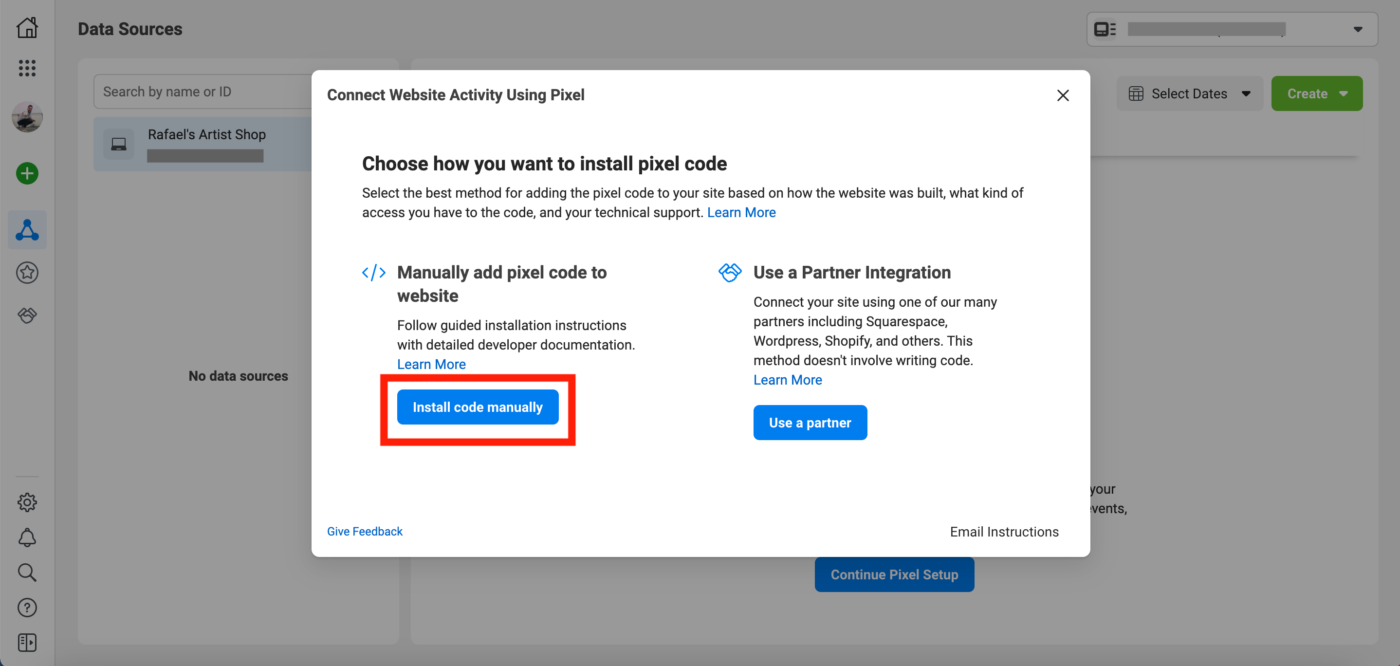
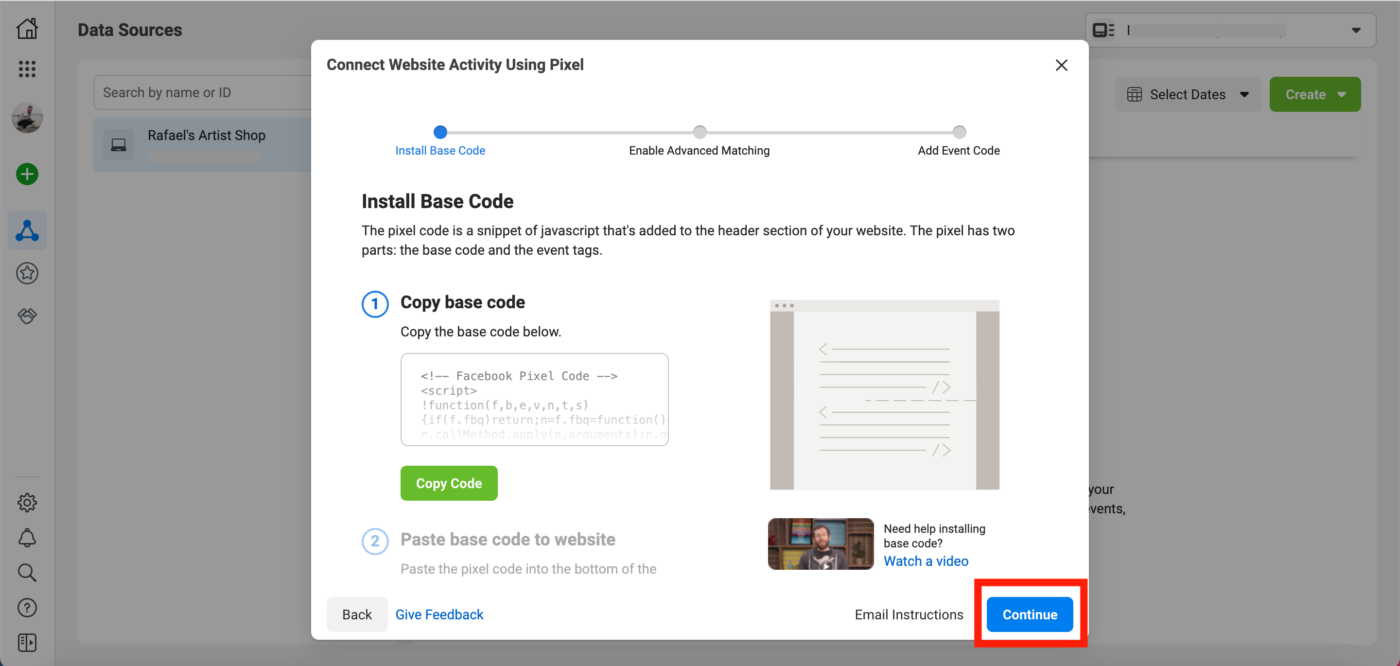
4. Click “Install code manually.”
5. Click “Continue.” You’ll need to retrieve your Pixel ID, but there’s actually an easier way to do that. More on that later!
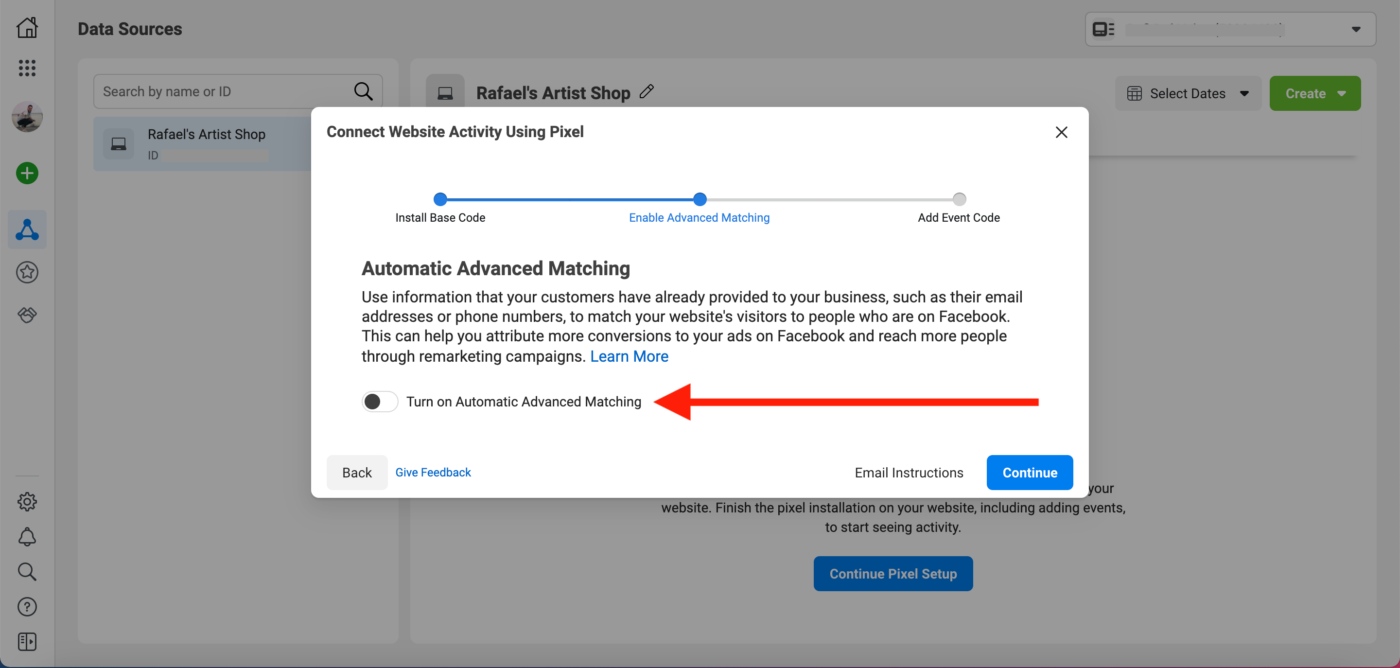
6. Toggle on “Turn on Automatic Advanced Matching” and click “Continue.”
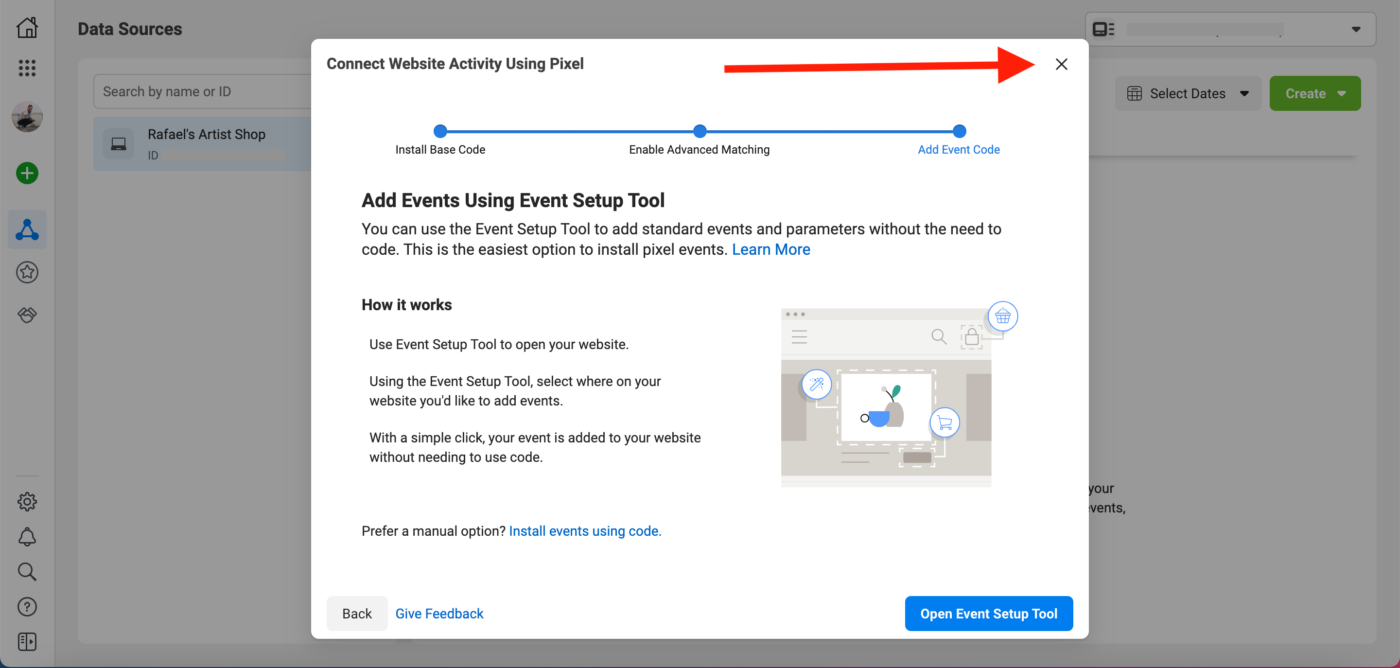
7. Once you’ve reached this screen, you can close the window. More on the Event Setup Tool later!
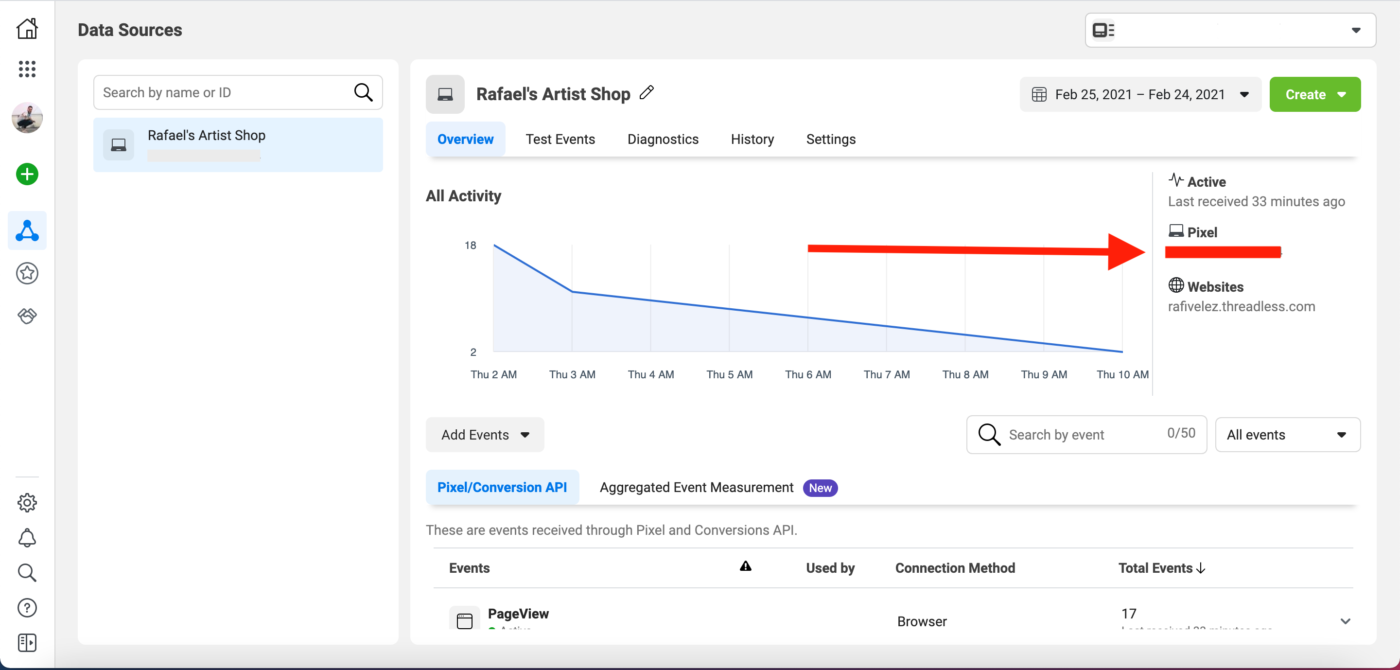
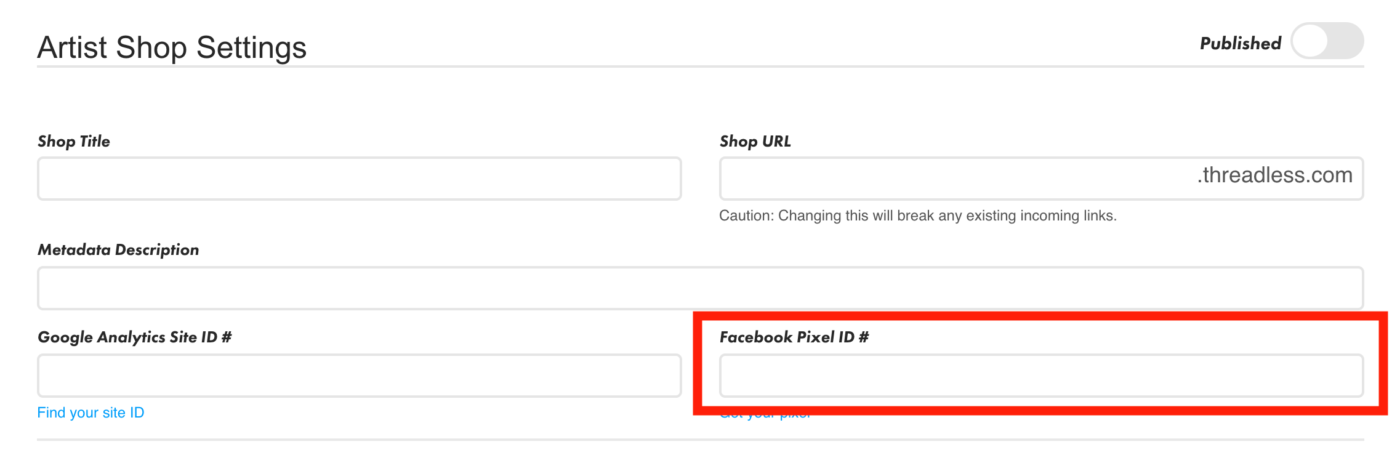
8. Go to your Pixel’s overview and click on your Pixel ID to copy it.
It’ll be right where that red rectangle is.
9. Go your Artist Shop Settings and paste your Pixel ID into the field that says “Facebook Pixel ID #.”
Don’t forget to save your settings!
Congrats! You’ve installed your Facebook Pixel!
Tracking “Events” with Your Pixel
Events are all the actions people take in your Artist Shop, like making a purchase or viewing a product. These events unlock advertising tools that will allow you to measure campaign results more accurately and grow your customer base.
There are a number of events you can set your Pixel to track, but to start, it should automatically measure these three:
- View Content: This will tell you each time a customer views any page in your shop.
- Add to Cart: This event tracks each time someone adds a product to their cart.
- Purchase: This will let you know when someone purchases a product.
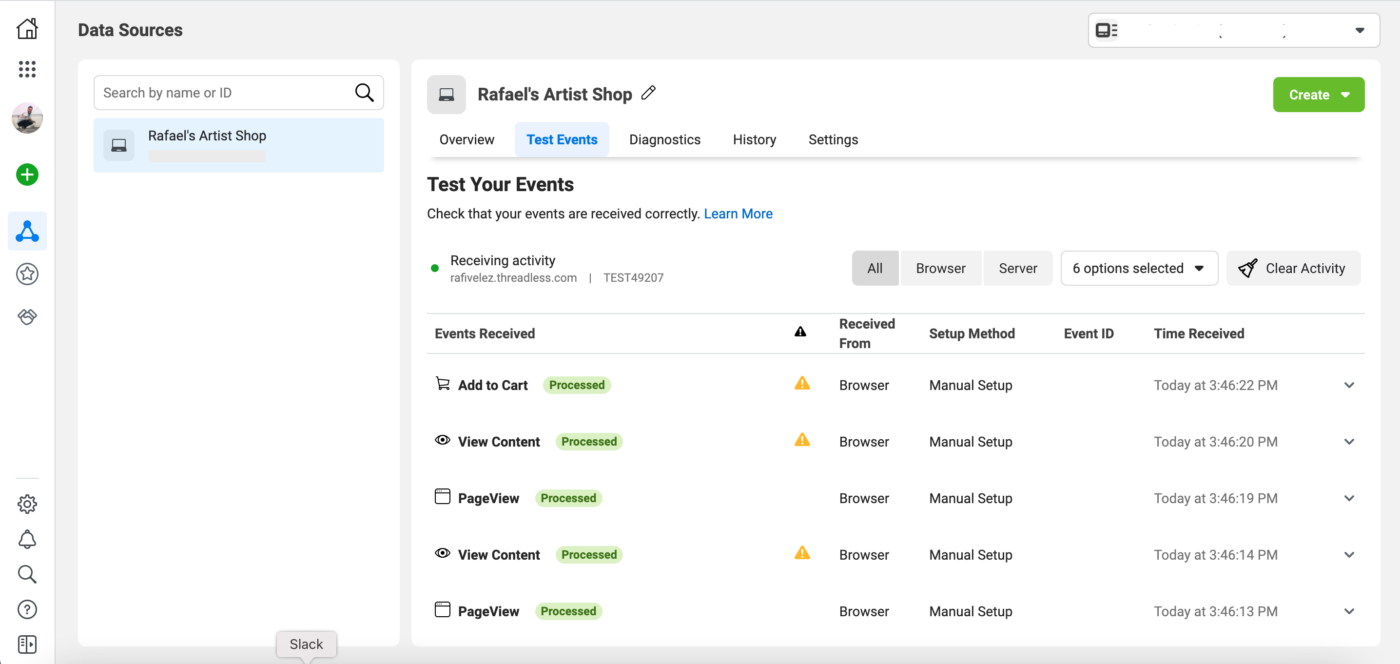
Before Creating Ads, Do a Test!
You can manually test whether or not your Pixel is properly tracking events by visiting your Artist Shop and adding stuff to your cart. Then, go to the “Test Events” tab in the Ads Manager to see if your Pixel tracked your actions.
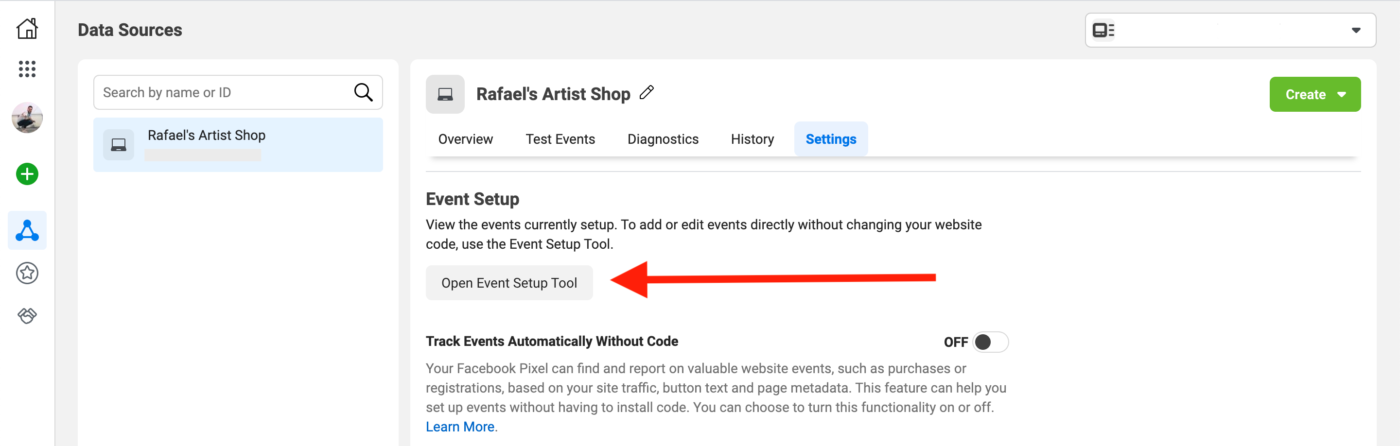
Customize the Events You Want to Track
If there are events you’d like to add or adjust, you can do so with the Event Setup Tool, which is available in your Pixel’s settings under Event Setup. Enter your Artist Shop URL and click “Open Website,” and the tool will launch in your web browser. It allows you to add standard events and parameters to your Artist Shop without the need to code.
Now you’re ready to set up ads and campaigns for your shop!
Creating a Facebook Ad
Once you've returned to the Facebook Ad Manager you can click the Create Ad button to make the type of ad you would like and feel free to check out our Anatomy of an Amazing Facebook Ad to learn what makes a great one.

We recommend Conversions as a way to increase and track sales. Be sure to give your Ad campaign a name to track and compare results.

After you've named the campaign, you'll need to pick your currency and time zone, then select your newly created

Selecting a Budget and Schedule
Using $10 a week for two weeks is a good way to see what ads and placements have positive results.

Selecting an Audience
For the first ad, reaching a larger audience is always better than getting super-specific. You can check out Facebook’s Audience Insights tool to further customize, but we recommend having at least 1 million people in the potential reach.
 Ad Placement
 Ad Placement
 You'll then get to select your ad placements and if you are brand new we recommend automatic placements just to see what works best.

Next, you'll be able to link any existing Facebook page or Instagram account to your campaign. If you haven't created any yet, you can make one quickly and fill it out later as they are a great resource for branding.

Selecting Your Ad Style
From there you can pick the style of ad you want to run. You'll be able to see previews for all types on the Facebook Ad format page or check out our Creative Resources post on designing a great Facebook ad.

After you've selected the style of ad, you'll need to pick the main image or images you would like to use. Great lifeestyle photos or product shots can make really eye-popping ad photos since they'll show your Shop products in action.

Adding a Call To Action
You're almost done! The final steps include adding your Shop URL and some ad copy to describe your sale. Simple is better and creating a sense of urgency can really give customers more of an incentive to click the post. Read even more ways to make your ads effective in our blog here.

When you're happy with how everything looks, just click on the green Publish button and make your Ad live!