Design Size and Placement: Apparel
Before we talk about sizing and placing your design, let’s start with the basics! Here are the recommended file requirements to add a design to your Artist Shop:
Recommended File Size
- 4200 x 4800 pixels (minimum 2000 x 2000px)
- 300 ppi
- Transparent .PNG
File is automatically resized to best fit across all products. Non-transparent .PNG or .JPG are accepted, but may not be optimized for every product Read more about Front and Back prints here.. After initial upload, you may upload additional files to customize design for other product
Suggested File Size by Product Type and templates can be found here
Plug in your art and you're ready to upload!
You can also find hi-res blank shots of all the Artist Shop products in the Artist Shop Gallery. Right-click on any product image to save a 1000 X 1000 file of the blank product. Add your design to see how it looks on the product and play with placement and background colors to create the perfect product for your Shop.
Now that you have the right file, there are 3 things to think about when considering your design size and placement:
- Design Size
- Design Placement
- Garment Placement
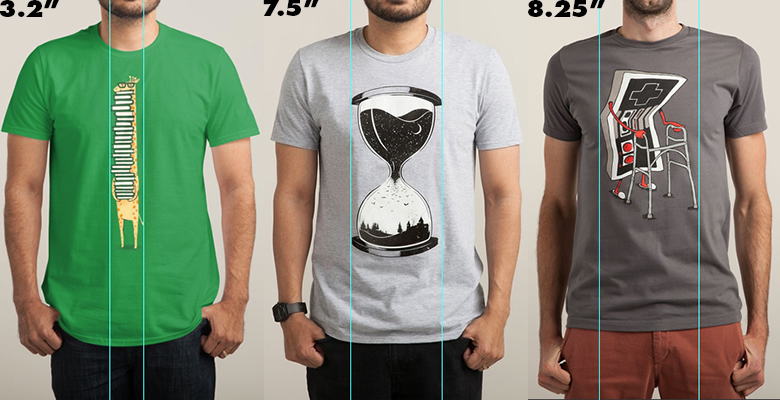
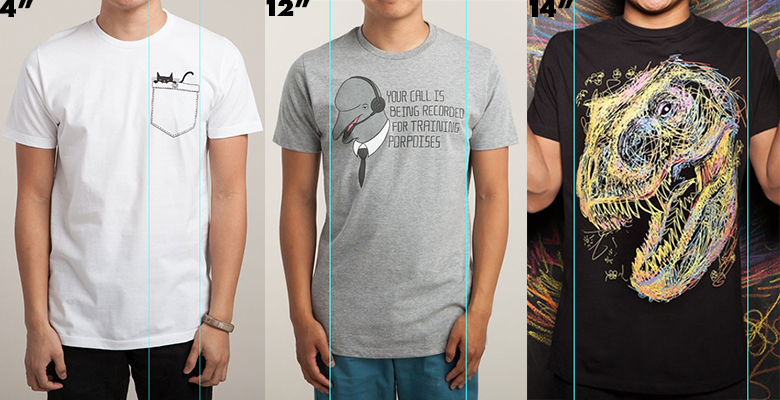
Design Size for Apparel
Sizing can be a tricky thing, but here’s a quick visual guide for common art sizing on garments. The middle row has the most common sizes on a lot of art, but remember – all art is different, so size as you wish! If you have a ruler and any t-shirt handy, you can also use that to help size a graphic!

Design Placement
Now that you’ve got your designs sized how you want, it’s important that you center your design properly. Some designs can be centered as easily as pressing the align button on the top toolbar in Photoshop or Illustrator. Make sure all elements centering are in a group or it will center individual elements instead of the whole design.)

However, it can get a little tricky when you have a design with a lot of background information or a design with a lot of elements in it.
Finding Your Design Center
 When you see something like this with a lot of little elements surrounded a design, you want to focus on the central graphic. In this case, the best point of centering would be to center to the circle around the yeti.
If you can eyeball this yourself, go for it, but here’s a quick process to get an accurate centering:
- Guidelines are your best friend. Make sure you have the ruler visible and simply click and drag from the ruler to create them. Do one guideline that hits the top of the object and another that hits the side.

- Take a marquee tool that best fits your central object – in this case elliptical marquee tool – and create a selection. To do this quickly with your two guidelines, shift+click at the point where the two guidelines meet (marked with a red circle in image) and drag it to fit your graphic.

- Create a new layer and fill this in with a color that is easy to see and won’t blend into your graphic. You can now use the align tool on this object to center it on the canvas.

- You will see the circle re-align and center itself onto the canvas. Now, select all of your design work and move it to match the newly centered circle. Once you do this, feel free to delete the filled layer on top.


You should be left with a graphic that is nice and centered to the central graphic!
Design Placement on a Garment
When placing your design in the template, keep in mind, there is a default 1-2 inch standard offset from the neck during the printing process. This means, if your design is justified to be flush to the top of the 14×16 template, the design will start 2 inches down. If you align your document to be 1-inch down from the top of the document, it will print ~3inches down.
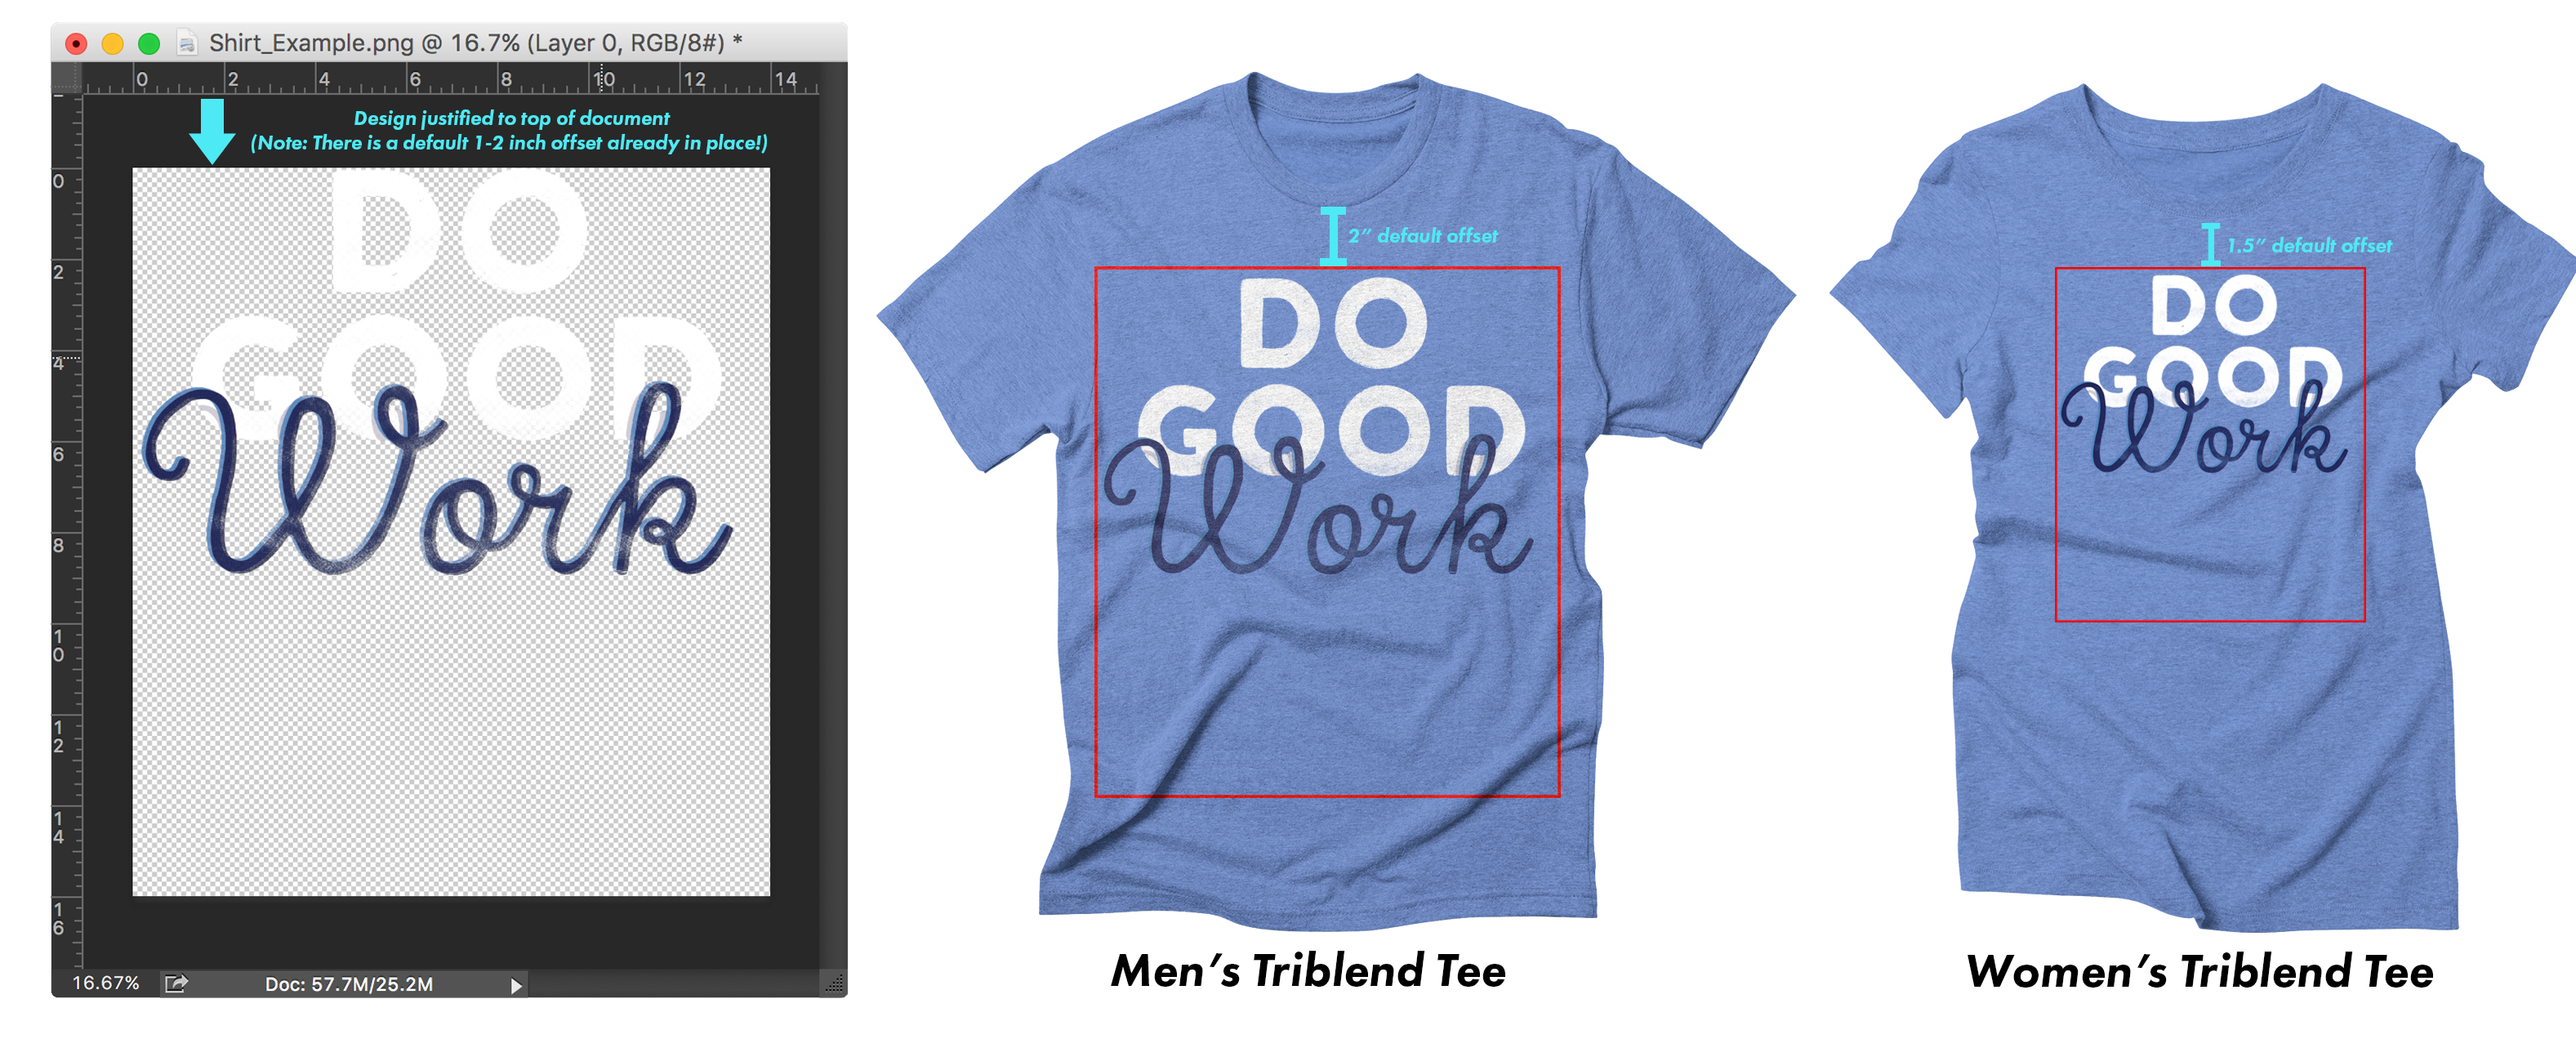
Seen above is a Men’s medium and a Women’s medium. Certain Women’s garments (small Women's tees, triblend tees, tanks, etc) use a smaller palette, which downsizes the design about 30%.
Check out Tips for Optimizing Your File for On-Demand Printing to help to maximize vibrancy by optimizing colors in your design and create a design file that makes your printed design simply awesome.